Are you looking for a simple yet cost-effective, and visually appealing way to sell event tickets on your Shopify store? Well, look no further!
In this blog post, we'll show you how to use the QR Code Generator Hub Shopify app to create customized QR codes and streamline your ticketing process.
Dynamic QR codes have become increasingly popular due to their versatility and ease of use. But the best thing about them is that they offer a secure and efficient method of ticketing. Thus, replacing the tedious and traditional paper tickets method with a digital approach to promote convenience.
Are you ready? Let's dive in and get started!
Understanding QR Codes for Event Tickets
Before we jump into the actual setup process, let's briefly explore what makes QR codes relevant for an efficient Shopify ticketing system.
QR codes, short for Quick Response codes, are two-dimensional barcodes that can store a large amount of data. When scanned with a smartphone or QR code reader, they instantly provide access to the information embedded within them.
In the case of event ticketing, each dynamic QR code can represent a unique ticket or pass for your customers. QR codes offer several advantages over traditional paper tickets. This includes:
Unique QR codes are harder to counterfeit,
reducing the risk of fraud at your events,
eliminate the need for physical tickets
and making ticket distribution hassle-free.
How to Start Selling Tickets on Shopify with QR Code Generator Hub?
Now that you know why you should use QR codes for your next event ticket selling, let's start creating them with the QR Code Generator Hub app for Shopify.
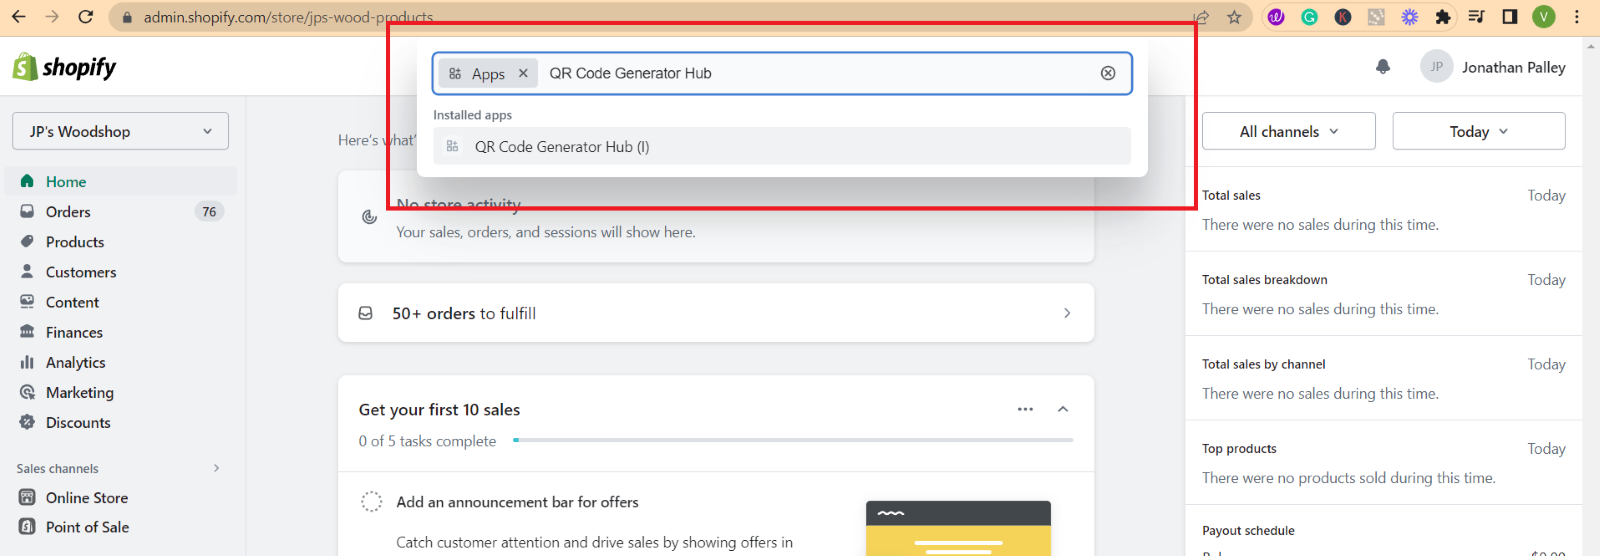
Step 1: Head over to your Shopify store admin and navigate to the "Apps" section. Use the search bar to find the "QR Code Generator Hub" app.
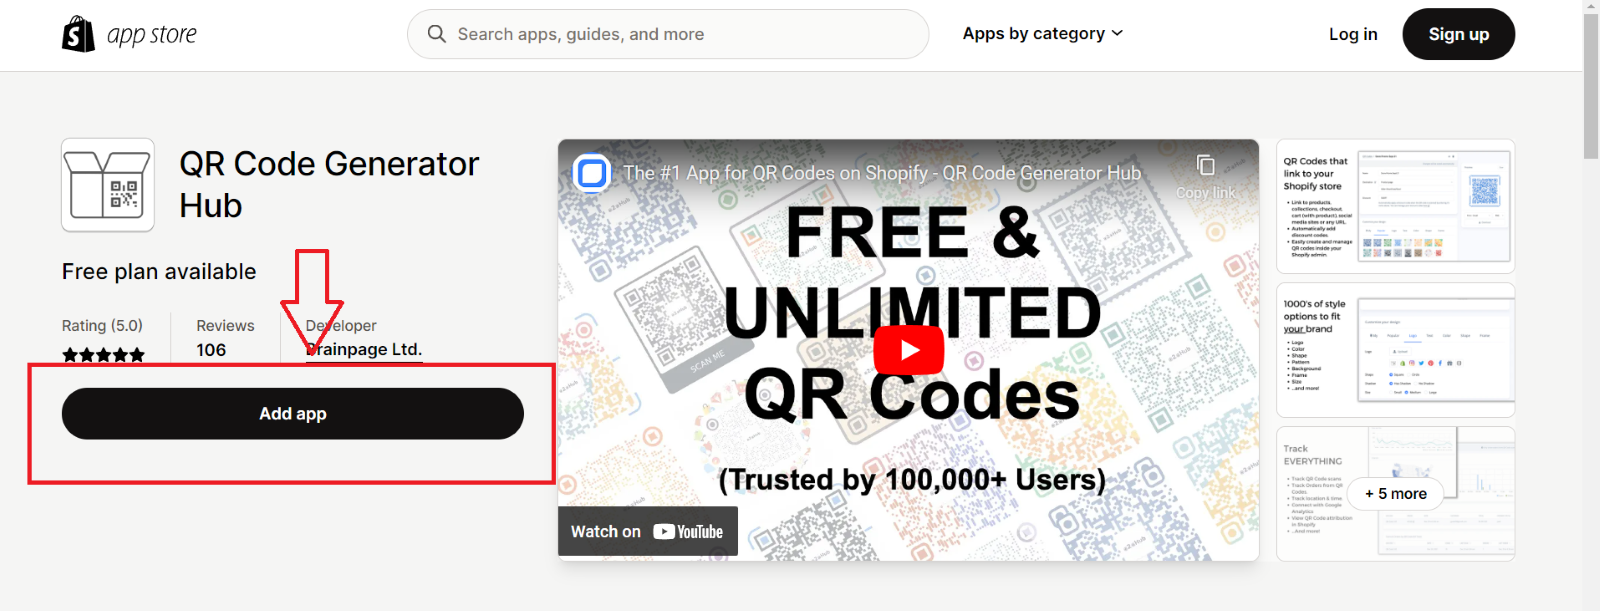
Click on the app to be directed to the Shopify app store. There, you can click the "Add app" button to initiate the installation process.
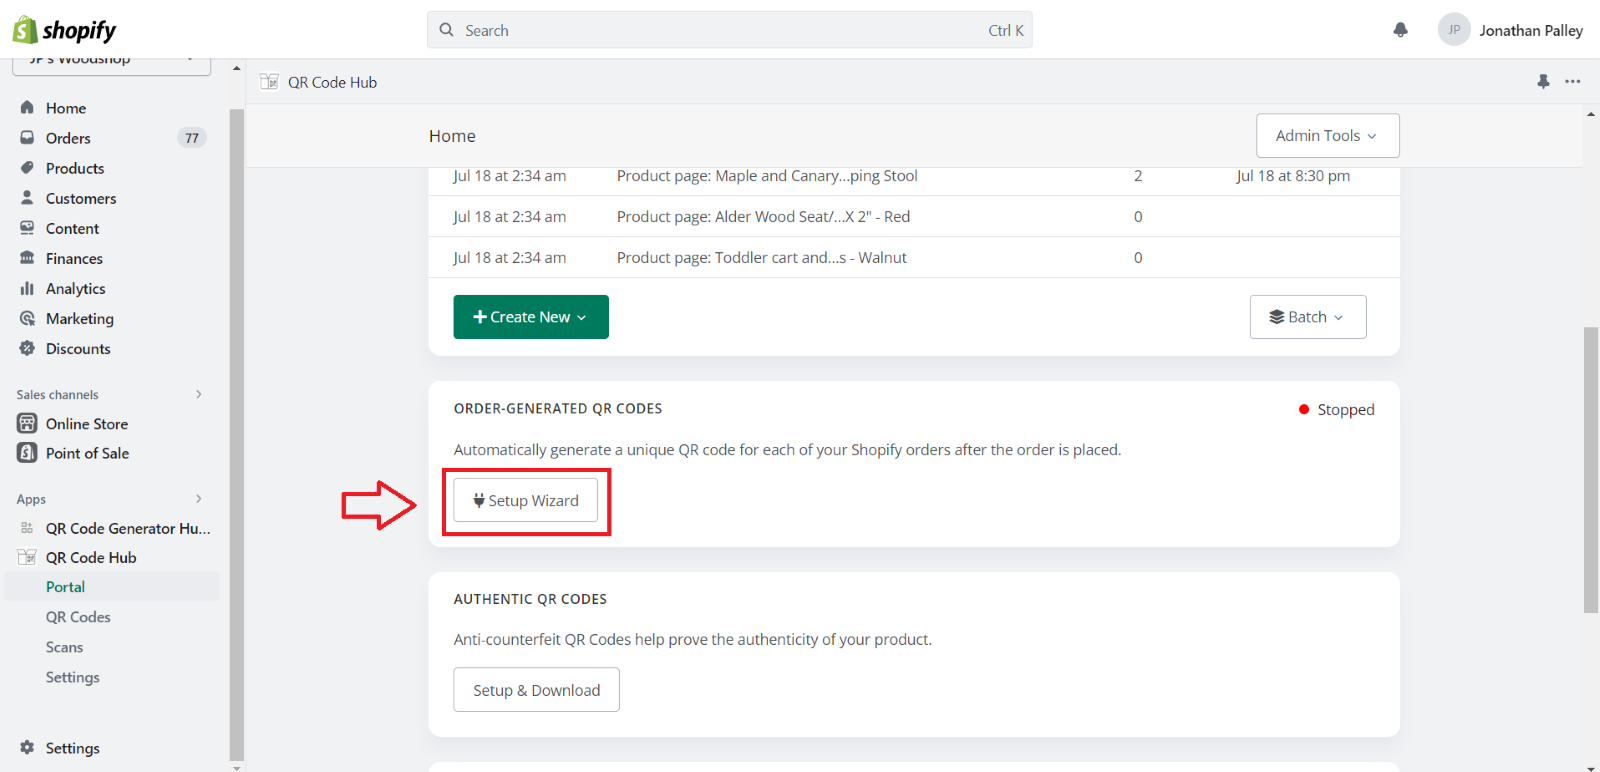
Step 2: On the left side of your screen, click on "QR Code Hub." Then, go to the "Order-Generated QR Codes" panel. This feature ensures that every ticket order generates a unique QR code. When your guests make a purchase, they'll receive an order confirmation email containing their QR code, which serves as their ticket.
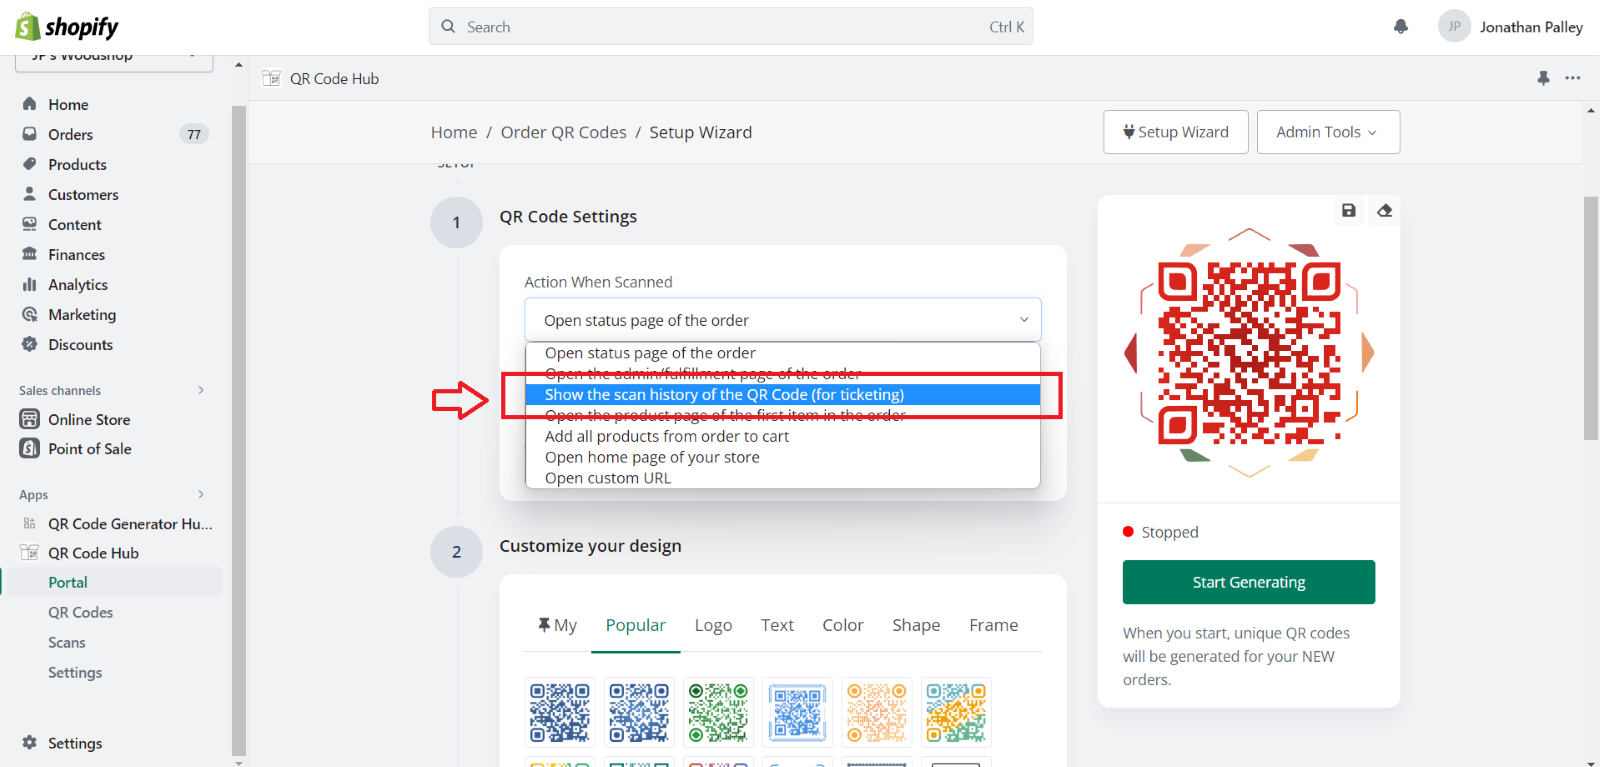
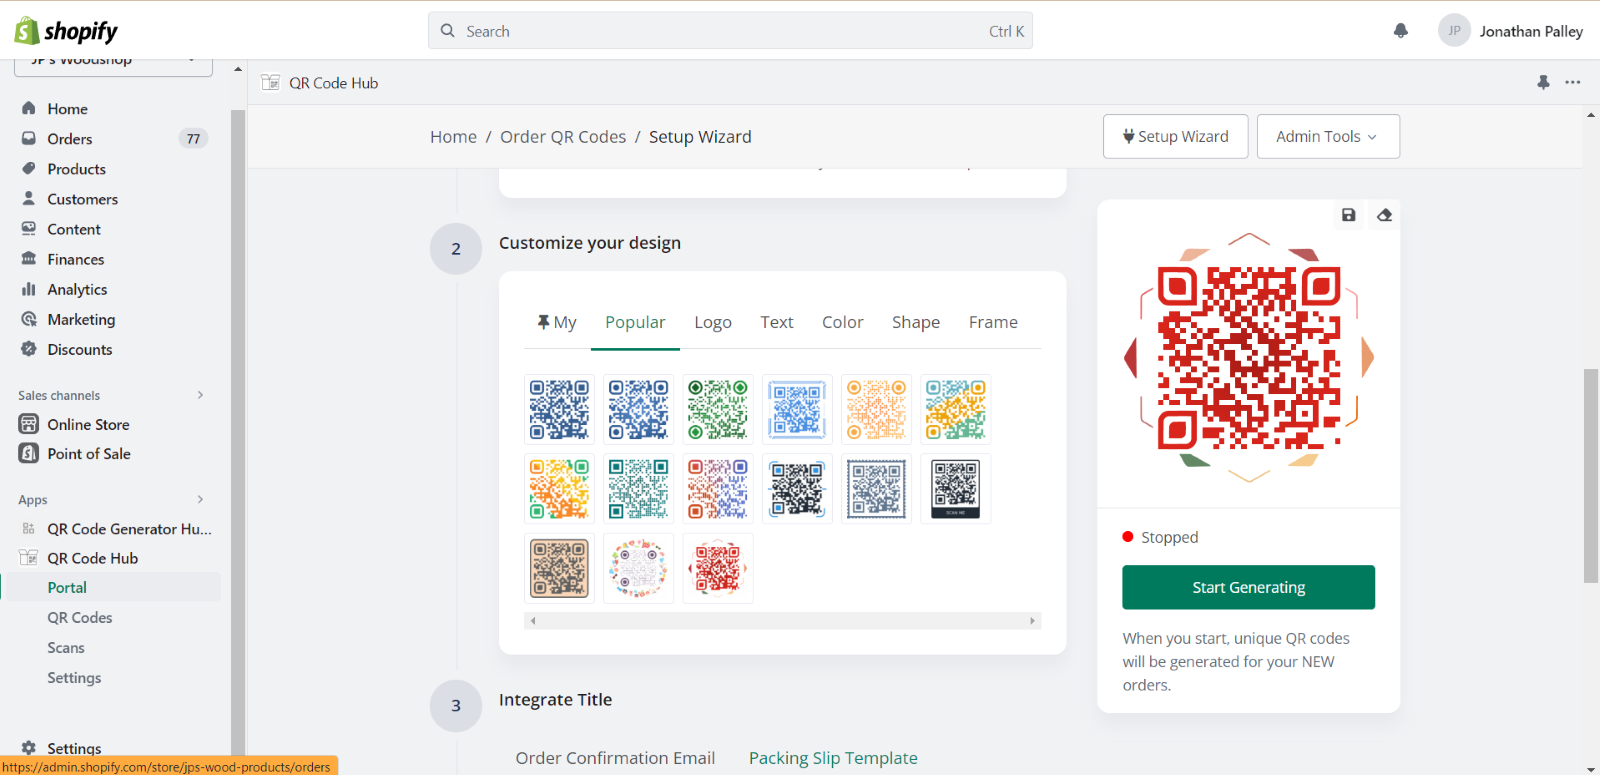
Step 3: For a standout event, customization is key! Access the "Setup Wizard" and choose the option to "Show the Scan History of QR Code (for ticketing)."
Here, you can input the number of QR code scans allowed per ticket.
Step 4: Get creative and customize your QR codes to match your brand or event theme. Explore different colors, styles, and logos, or even include embedded order information – the possibilities are endless!
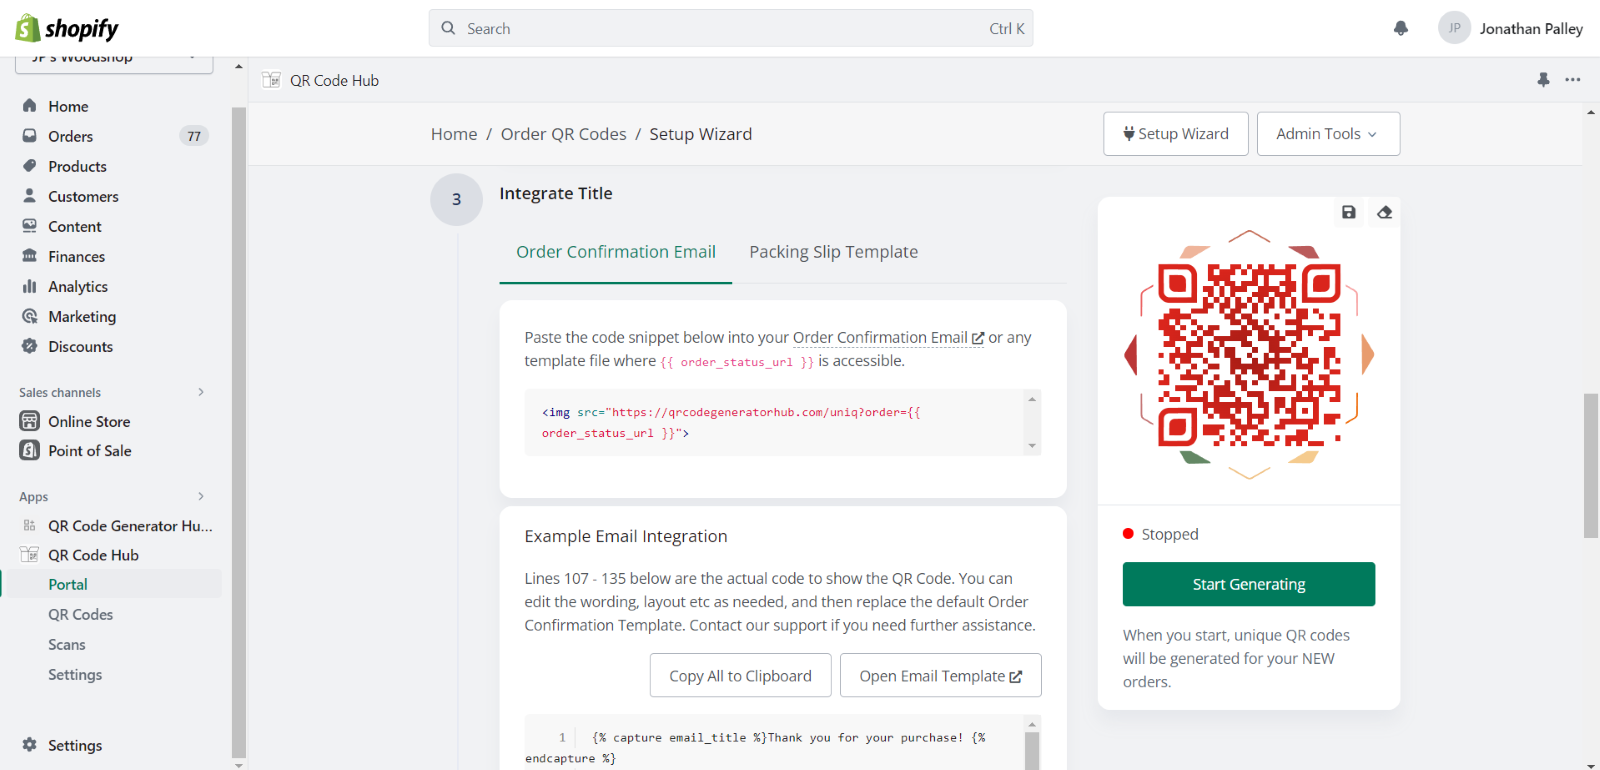
Step 5: Next, paste the generated QR code into your order confirmation email template. This way, your guests will receive their QR code tickets along with clear instructions for event entry.
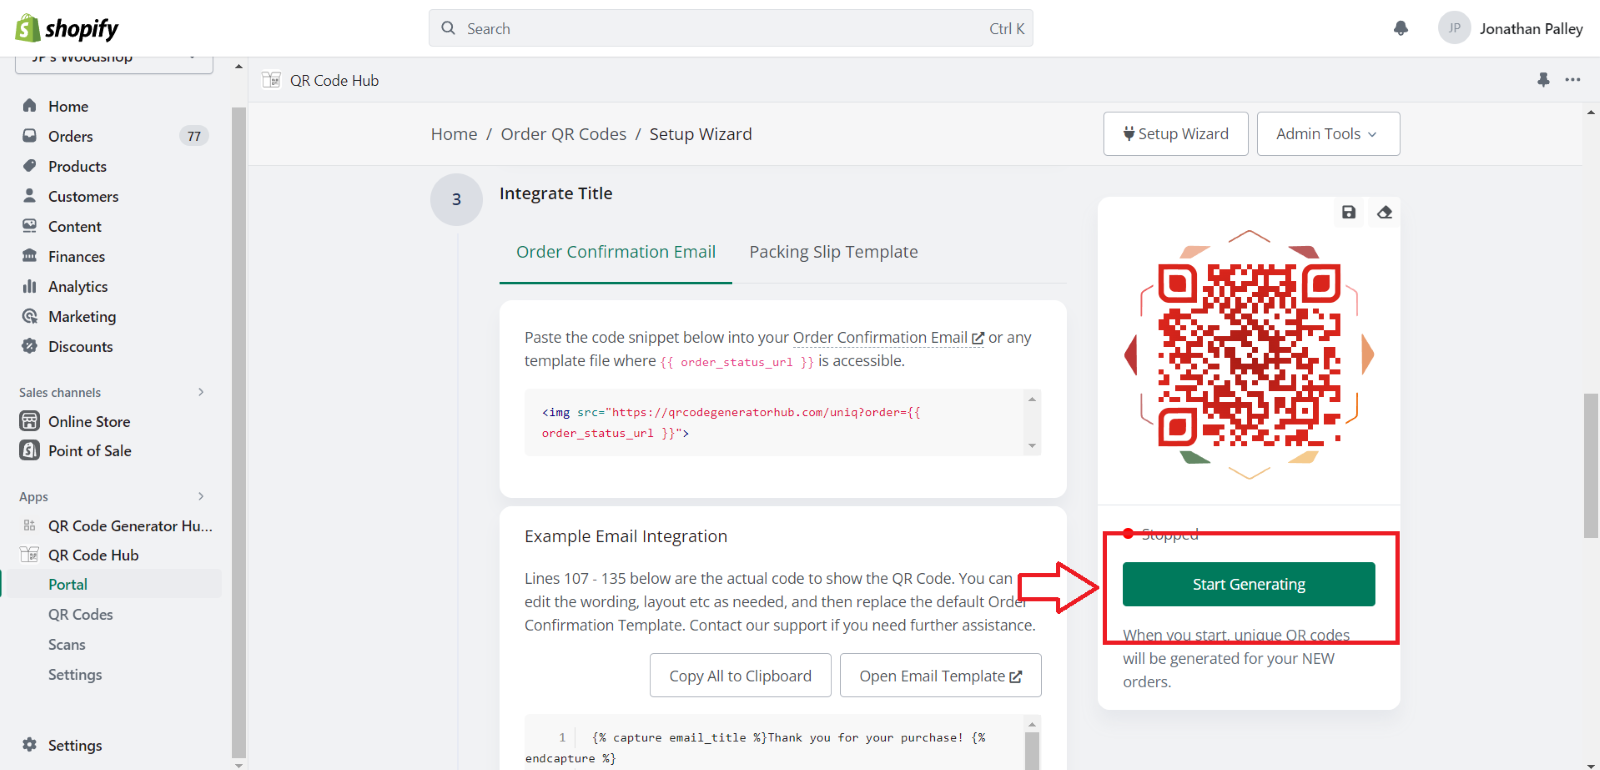
Step 6: With your customized QR codes ready to go, it's time to integrate them seamlessly into your Shopify store. Simply click the "Start generating" button and enjoy a smooth ticketing experience for your customers.
So when the big day arrives, you'll witness the magic of QR code ticketing in action. Your event organizers can also effortlessly scan the QR codes at entry points, instantly validating each ticket's authenticity.
The app also has a QR Code Scan History feature that lets you check if a ticket has been scanned before. This may come in handy to prevent any potential ticket duplication.
5 Best Practices to Create Visually Appealing QR Codes
Before you hit the “Start Generating” button in the app, you should first check these QR code creation practices.
If you are an eCommerce store aiming to grow in the industry, considering these practices is important to impose your branding. Here are some of them:
Use High-Contrast Colors to Enhance Scannability: Choose color combinations that provide a clear contrast between the QR code and the background, making it easier to scan.
Incorporate Brand Elements to Promote Brand Awareness: Add your brand's logo or elements that reflect your event's theme to boost brand recognition.
Optimize QR Code Size for Easy Scanning: Strike a balance between a visually appealing size and a scannable QR code. Avoid making it too small, as it may affect readability.
Include Clear Instructions for Users: Let customers know what the QR code represents and how it will be used at the event.
Test QR Codes Across Different Devices for Compatibility: Ensure that your QR codes scan flawlessly on various devices and QR code readers.
Additional Benefits of QR Code Ticketing on Shopify
Apart from the technical security aspects, QR code ticketing offers several additional advantages such as the following:
It reduces paper usage, contributing to an eco-friendlier event.
Attendees can easily access their tickets on their smartphones, eliminating the risk of lost tickets.
The affordability of QR code ticketing makes it a win-win for both event organizers and customers.
There you have it—a comprehensive tutorial on creating customized QR codes for event tickets on Shopify.
By leveraging the "QR Code Generator Hub" app, you can implement a seamless, cost-effective, and visually appealing ticketing system for your events. From easy setup to efficient entry management, QR codes revolutionize the way you sell tickets, benefiting both you and your attendees. And the best thing about all these things is that you can do them for FREE.
So, what are you waiting for? Embrace the power of QR code ticketing and elevate your event experiences to new heights!